Monday, April 10, 2006

Adventures in Ravioli


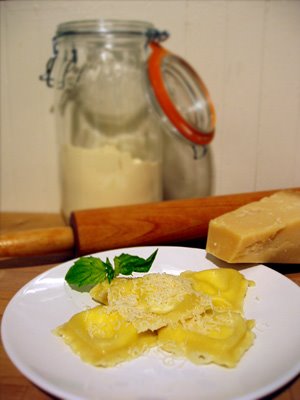
So last night I decided it would be a good idea to try making homemade ravioli, from scratch. I started off enthusiastic, thinking it will be one of those challenges I can learn from. Boy was I right. Luckily after all was said and done, we had a yummy dinner and they didnt look half bad. And this picture here is proof. Thats right! Thats not some photo I stole from a site. That was taken, last night, in my kitchen, with my rolling pin and jar of semolina flour. Mhmm.. alright. Enough gloating.

For those who wish to partake in the same adventure I am going to link you to the recipes that I used from various sites. I will also interject my own comments and suggestions.

The first step is making the pasta dough. This takes a bit of effort if you, like me, dont have an electric mixer and need to do it by hand. This allrecipes.com recipe has photos and step by step instructions.

Something they left out...(that would have been nice to know)
In Step 2, when you start to mix the egg with the flour, slowly mix from the inside out, depending on the humidity and size of your eggs you may not need to mix in all of the flour. just keep adding until it starts to firm up and stop being sticky. dont force the rest of the flour making it dry and hard to work with.

While your wrapped up pasta dough is sitting around, this is the perfect time to make your filling. The great thing about making homemade ravioli is that you can stuff them with whatever you like. I chose to go with a more traditional ricotta cheese/egg/parmesan cheese mix. But in the future i plan to mix in some pesto, or spinach. or even try some non conventional fillings like the mashed potatoe ones listed in their recipe, or a butternut squash mix. The possibilities are endless.

How much stuffing you make depends on how many raviolis, how big they are, etc. so i would just try and guesstimate. But if you follow their recipe of 3 cups of semolina flour and 3 eggs, you'll probably need a cups worth of filling.

The next step is making the noodles. This also can take a bit of effort, if you, again like me, dont have a pasta machine and need to roll the noodles flat by hand. This allrecipes.com recipe again has nice photos and easy to follow steps. (if you dont have a machine skip to step 14 and get rolling.

While rolling keep in mind the shap of the noodle you want to make. If you are using a mold you will need a long noodle that is wide enough to cover the mold completely. Also make sure to keep dusting the surface with flour and flipping over so stuff doesnt stick.

This is the kind of ravioli mold that I used. You can make your ravioli anyway you want, but using the mold is an easy way to have uniformed looking squares. To use the mold you need one wide long rolled out sheet of pasta. You dust a little flour on the mold and then lay the noodle ontop. Gently with your fingers you can press the noodles into the indents to make a little space for the filling.

Once your first noodle is on the mold you can start filling each little try with a small amount of filling. Depending on the size of your tray you want to make sure the filling doesnt over flow. just enough to fill the space.

When all your little trays are full then you take your second long wide noodle and gently lay it over the filled mold. with your hands flatten it out carefully to try and get rid of any extra air pockets. once this is done you can use your rolling pin to roll firmly across the top. The mold has raised separations that will cut each ravioli out.

When you are done, in theory, you can just turn your mold over and the little raviolis will pop out. (i had to carefully peel mine out because i forgot to dust the mold with flour)

So there you go, perfect, or not so perfect ravioli that you made! To cook submerge them in boiling salted water for 3-4 minutes. Fresh pasta doesnt take as long to cook.

If you want to freeze the ravioli for later, place the ravioli in a single layer on a parchment lined cookie sheet. Do not throw the ravioli together in a bowl. It will stick together. Put the entire cookie sheet into the freezer. Once the ravioli has frozen, you can remove the pasta and put them into bags.

Sunday, April 09, 2006

Rainy Day Banana Bread

For those who live in SF, you know its raining right now. It's been raining for a while. So to counteract these gloomy days, I propose a little Banana Bread Therapy. Its a surprisingly easy 7-step Program, and guarantees results. Once completing the program you will be happier for many reasons.
1. your home/apt will smell heavenly
2. your tastebuds and stomach will be very grateful
3. anyone you decide to share this with will love you unconditionally.

It's really a win-win situation. So join me in some Banana Bread Therapy =)

Ingredients: (makes 1 loaf)

2 cups all purpose flour
1 tsp baking soda
1/4 tsp cinnamon
1 tbsp white granulated sugar
1/4 tsp salt
1/2 cup butter
3/4 cup brown sugar
2 eggs
2 1/3 cup mashed overripe banana (approx. 6 bananas)

Directions:
1. Preheat oven to 350 degrees F (175 degrees C). Lightly grease a 9x5 inch loaf pan. To do this I like to lightly rub a stick of butter to lightly coat inside, and then sprinkle the white granulated sugar evenly. Not to completely cover, but just dust the inside of the pan.

2. In a medium sized bowl mash the bananas. This is the only slighty strenuous part of this recipe. Mash them up right nice so there are still chunks, but overall its liquidy.

3. In a large bowl, combine flour, baking soda, cinnamon and salt.

4. In a separate bowl, cream together butter and brown sugar. Stir in eggs and already mashed bananas until well blended.

5. Stir banana mixture into flour mixture; stir just to moisten. Pour batter into prepared loaf pan.

6. Bake in preheated oven for 60 to 65 minutes, until a toothpick inserted into center of the loaf comes out clean. Let bread cool in pan for 10 minutes, then turn out onto a wire rack.

7. Eat and enjoy!

Tuesday, April 04, 2006

Mushroom Mania: Part I

I have decided to put together a little guide of some incredible edible mushrooms, that shockingly, not many people know about. I have to admit that a mere 2 years ago I had never tried or even heard of these marvels of nature. (just to clarify, the mushrooms i am going to describe below are not the "magic" kind. Any euphoric experiences from eating these are from their flavor alone)

Im going to start off with a shocker, and introduce you to... the....

Trumpet of Death Mushroom
(oooohh, aaaahhhhh, so scary!)

Dont run away just yet. This mushroom also goes by some more friendly names, such as "Horn of Plenty" or "Black Trumpet".
This mushroom is very popular in french cuisine because of its unique flavor and texture. Fresh specimens are said to smell like apricots. Although they are hard to find in the wild, growing mostly under Oaks in the woods, you can also find these (depending on the season and location) at some health stores and farmers markets. If you live in SF there is an amazing store at the Ferry Building called Far West Fungi, who carries a wide variety of local wild mushrooms. Also there is Rainbow Grocery (13th@Folsom) who has a nice selection too.

These mushrooms are delicious and can create a dramatic looking meal with their glossy black presense. To prepare them from fresh (this is what they look like fresh). Clean them by splitting them in half and rinsing under cool water. you can leave them in large chunks or rip them into smaller strips. My favorite way to prepare them is to sautee them in a little bit of butter till they release their juice and are soft, then i mix them into a Risotto or Toasted Cous Cous dish.

If you have found them dried (this is what they look like dried), you can reconstitute them in warm water, leaving them to soak for approximately 30 minutes. The dried mushrooms will release a lot of flavor into the water, which after soaking you can strain and use it to cook pasta or rice. Once the mushrooms are reconstituted you can cooked them as if they were fresh.

Coming soon, the mysterious and evasive Morel Mushroom. Stay tuned.

Portabella Mushroom Burgers

These juicy mouth watering grilled burgers are one of my favorites. They are easy to make and oh so scrumptious. Definately a must have for summer (well, winter, spring and fall too of course.)

Ingredients for 2 burgers:
2 portabella mushrooms (image here)
3 tbsp olive oil
3 tbsp basalmic vinagrette
1 clove garlic
1 bell pepper of your favorite color
(i like the yellow/orange mix, so pretty)
1 red onion
crumbled feta cheese
3 tbsp veganaise
(what is this?!? well, its exactly like mayo, but with no egg, you can use mayo if you must, i wont hate you)
mustard (if you have whole seed mustard, great! if you have never tried whole seed mustard, what in gods name have you been doing all this time? go now, buy some. This is a great brand, and is in almost every store be brave lost soul
2 french or sour dough rolls/buns

Directions:
Here we have 2 options. If you have a bbq/grill i recommend using that. If it is raining and cold outside or you dont have a bbq/grill then a pan on the stove will suffice.


1. gently snap off the stems of your mushrooms and with a moist towel wipe off any dirt that may be on the cap. if there is a lot of dirt you can wash them, but keep it brief, mushrooms are like sponges.
2. To make the marinade mix the olive oil and basalmic vinagrett in a small bowl, cut the clove of garlic in half and crush 1 half into the bowl. mix well.
3. Place the mushrooms gills side up on a plate and pour half of the garlic/olive oil/vinagrette goodness on each mushroom. with your fingers you can spread the marinade so all the gills get some. and then pour off the remainder onto the plate and smear some on the cap. Leave sitting gill side up for 10 minutes. (the longer you can marinade the better)
4. while the mushroom are marinading you can cut the bell pepper into 1 inch wide strips and rub olive oil on them.
5. then you can slice the onions into rings and put a little olive oil on those too.

Option 1: The great outdoor adventure
- over a medium hot fire grill the marinated mushrooms, onions and bell peppers till they are all soft (approx 5 min on each side, flipping the mushrooms halfway through.)

Option 2: The also great indoor adventure
- over medium heat sautee the mushrooms, onions and bell peppers till they are all soft (approx 5 min on each side, flipping the mushrooms occasionally.) The mushrooms will release their juice, and if it starts to get soggy looking feel free to pour some of it off into the sink.

The rest is the fun part, putting it all together.

Crush the remaining half of garlic into the veganaise/mayo and spread on one half of the bun. add a little mustard to the other, lay a mushroom on, some onions, a couple strips of bell pepper, sprinkle some of the goat cheese on and voila.

enjoy =)